The conformal coating process protects a tested PCB assembly with a thin polymer film. In production, the usual flow is testing, cleaning, masking, coating application, curing, and inspection.
If a failed board moves to coating too early, rework becomes slower and more expensive. If keep-out areas are unclear, connectors, switches, test points, or sensors may be coated by mistake.
Use this guide to understand each step and prepare the right coating requirements before production starts.
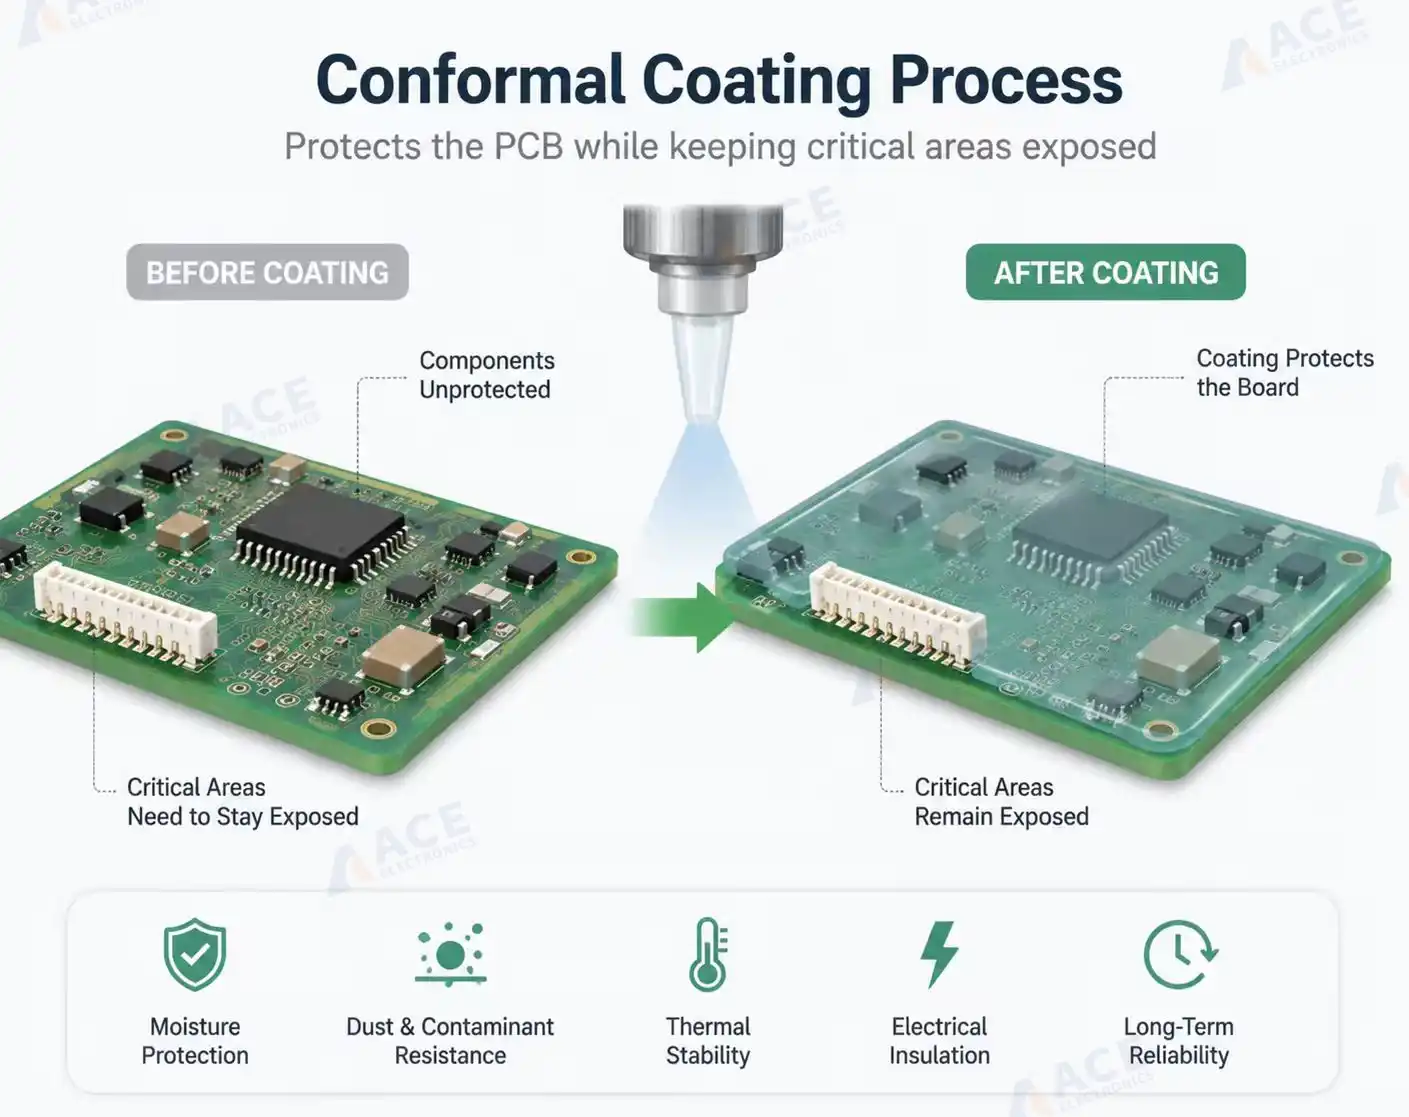
The conformal coating process protects the assembled board while keeping connectors, test points, switches, and other no-coat areas exposed.
What Is the Conformal Coating Process?
The conformal coating process is the production sequence used to prepare, coat, cure, and inspect a PCBA. It usually happens after assembly and electrical checks.
A simple process flow looks like this:
| Stage | What happens | Why it matters |
|---|---|---|
| Testing | The board is inspected and electrically checked before coating. | Failed boards should not move into coating. |
| Cleaning | The board surface is prepared before coating. | Coating should not trap flux residue, dust, or moisture. |
| Masking | No-coat areas are protected. | Connectors, test points, switches, and contacts must stay usable. |
| Application | Coating is sprayed, dipped, brushed, or selectively applied. | The method affects coverage, repeatability, labor, and cost. |
| Curing | The coating dries or cures by air, heat, UV, moisture, or another material-specific method. | Cure time affects handling and lead time. |
| Inspection | Coverage, keep-out areas, thickness, and visible defects are checked. | Inspection confirms the process did not create a new reliability problem. |
This article focuses on the process. For material selection, start with our PCB conformal coating guide.

This production video shows conformal coating applied to a PCB assembly by manual brush coating and machine coating. The right application method depends on board layout, no-coat areas, order quantity, and inspection requirements.
Where Coating Fits in PCBA Production
Coating should be planned as part of the PCBA production sequence.
In a typical order, the board moves through:
- PCB assembly
- AOI, X-ray, or visual inspection where needed
- Firmware loading if required
- ICT, FCT, or product-specific testing
- Cleaning or surface preparation
- Masking
- Coating application
- Curing
- Coating inspection
- Final assembly, enclosure assembly, packaging, or shipment
This sequence may change by different product, but the key rule is simple: confirm the board works before you coat it. Coating can protect the product in the field, but it also makes repair harder.
If your order includes firmware loading, testing, coating, and enclosure assembly, define the pass/fail sequence before production starts. Your assembly partner should know which boards can move to coating and which boards must be repaired first.
Step 1: Test Before Coating
Run electrical checks before coating whenever the design allows it. A missing component, wrong value, solder issue, firmware problem, or failed connector is easier to fix before the board is coated.
Testing before coating may include:
- AOI for visible assembly issues
- X-ray for hidden solder joints when needed
- ICT for electrical checks
- Firmware loading
- Functional testing
- Product-specific test fixtures
If a defect is found after coating, the repair usually takes longer:
- Locate the failed area.
- Remove or soften the coating.
- Replace or repair the component.
- Clean the repaired area.
- Reapply coating.
- Inspect and test again.
That extra work can delay a production run. It can also damage the board if the coating is difficult to remove.
Step 2: Clean and Prepare the Board
Thorough PCBA cleaning removes all residues. It ensures firm coating adhesion and stops dirt from being sealed under the film.
Cleaning needs depend on:
- Flux type
- Assembly process
- Board layout
- Component sensitivity
- Customer cleanliness requirement
- Coating material
Different PCBA project uses different cleaning process.
Before mass production, we confirm if the order needs standardized cleaning procedures, cleanliness inspection or special handling rules. Careful handling is essential after cleaning. Fingerprints, dust, lint and moisture will cause coating defects. In production, cleaned PCBA are only handled by the edges, stored in dedicated trays, and transferred to coating immediately without delay.
Step 3: Mask No-Coat Areas
Masking protects areas that should not receive coating. This step is important because a coated connector or test point can cause immediate production problems.
Common no-coat areas include:
- Connectors and sockets
- Test points and programming pads
- Switches and buttons
- Edge fingers
- Grounding pads
- RF antennas or RF contact areas
- Sensors, microphones, displays, and optical windows
- LEDs that must remain optically clear
- Heat-transfer surfaces
- Mechanical mating areas
For formal PCBA orders, mark non-coating zones on both the top and bottom of the board. If a connector can be coated on one side but not the mating side, state it clearly. Any test points reserved for subsequent testing should be marked before quotation confirmation.
Masking influences both cost and lead time. PCBA with many connectors, test points, switches, sensors and exposed contacts needs longer preparation time, as every non-coating area must be fully protected before coating.
For a more detailed review of no-coat areas, masking dots, plugs, caps, boots, and fixture planning, see our conformal coating masking guide.
Step 4: Apply the Coating
Conformal coating application can be manual or automated. The right method depends on board design, coating material, volume, coverage needs, and no-coat areas.
| Application method | Best fit | Limits | Buyer note |
|---|---|---|---|
| Spray coating | Many PCBA production orders; manual or automated coverage | Overspray and masking control matter | Useful when coverage needs control but the board is not fully dipped |
| Dip coating | Boards that need broad coverage on both sides | Masking must be very clear; not suitable for every assembly | Can be efficient when the layout supports it |
| Brush coating | Touch-up, repair, prototypes, or small areas | Manual consistency is limited | Not ideal for repeatable high-volume coverage |
| Selective coating | Repeatable automated coating for defined areas | Setup and programming add cost | Useful for higher-volume or complex boards |

Dip coating can provide broad coverage on a PCB assembly, but masking must be clearly defined before the board enters the coating process.
Spray conformal coating is familiar, but it is only one application method. Choose it when it fits the board layout, volume, coating material, and inspection requirement.
For higher-volume orders, automated or selective coating may reduce variation. For small runs or touch-up, manual methods may be enough.
If material choice is still open before the process is locked, compare the main options in our acrylic conformal coating guide, silicone conformal coating guide, and urethane conformal coating guide.
The board also needs to be held in a stable position during coating. Tall components, dense connector areas, board edges, and bottom-side parts can affect how the coating flows and where it collects. If both sides need coating, the production team may need extra handling time between sides.
Step 5: Cure the Coating
| Curing method | How it works | Production note |
|---|---|---|
| Evaporative cure | The carrier solvent or water evaporates and leaves the resin film on the board. | Solvent-based coatings often cure faster but need ventilation and safe handling. Water-based coatings reduce flammability concerns but usually need more drying time and better humidity control. |
| Moisture cure | The coating reacts with moisture in the air to complete the cure. | Common with some silicone and urethane systems. Cure time can change with humidity, coating thickness, and airflow. |
| Heat cure | Heat is used to speed up or complete curing. | Useful when the production schedule needs faster handling, but the temperature must be safe for the PCB, components, labels, plastics, and connectors. |
| UV cure | UV light cures the coating quickly in exposed areas. | Good for faster production, but shadowed areas under components may need a secondary cure mechanism. UV equipment and worker protection are also part of the process. |
| Dual cure | UV, moisture, heat, or another method works together to cure exposed and shadowed areas. | Useful when fast surface cure is needed but the board has areas that UV light cannot reach. |
Cure time affects lead time and handling. A coating may look dry on the surface before it is ready for packing, testing, or enclosure assembly. If boards are stacked or handled too early, the coating can mark, shift, collect contamination, or fail inspection.
Do not choose a curing method only for speed. The process should match the coating material, board layout, component sensitivity, and final assembly schedule. For example, UV cure can improve throughput, but it may not be enough by itself if tall components create shadowed areas. Heat cure can shorten waiting time, but it must not damage heat-sensitive parts.
Step 6: Inspect After Coating
Inspection checks whether the coating was applied correctly and whether the process created visible defects.
Inspectors usually check:
- Coverage across required areas
- Clean no-coat areas after masking
- Coating on connectors or test points
- Bubbles or trapped air
- Pinholes or missed areas
- Dewetting or poor adhesion
- Cracking
- Delamination
- Contamination under the coating
- Conformal coating thickness when specified
If the material contains a UV tracer, inspectors can use UV light to see coating coverage more clearly. This is useful for finding missed areas, uneven coverage, or coating on areas that should remain exposed.
These conformal coating defects are usually easier to correct before the board moves into final assembly or enclosure assembly.
UV-traceable coatings help inspectors check coverage and missed areas.
Do not over-specify coating thickness for extra safety.Insufficient coating fails to protect the PCBA, while excessive thickness leads to curing defects, connector interference, enclosure fitting issues and difficult rework. The target coating thickness shall match the coating material, PCB design, application environment and customer requirements.
Full inspection must be completed before coated PCBA are packed, shipped or assembled into housings. Defects found after enclosure assembly will require disassembly, making coating repairs far more complicated.
Common Process Problems to Avoid
Most coating problems start before the coating is applied. They come from unclear requirements, weak testing, poor cleaning, or missing keep-out instructions.
Watch for these issues:
- Coating boards before functional testing
- Trapping flux residue, dust, oil, or moisture under the coating
- Missing keep-out areas
- Coating connectors, switches, or test points
- Choosing a coating method that does not fit the board layout
- Handling boards before the coating has cured
- Applying too much coating
- Skipping UV or visual inspection
- Sending no coating thickness or standard when the project requires one
- Leaving rework expectations unclear
What to Define Before Production Starts
A clear order package helps your assembly partner quote the process and avoid preventable delays.
Include these details before production:
- Product use environment
- Coating material, if already selected
- Required coating method, if specified
- Keep-out drawing or marked board image
- Connectors, test points, switches, sensors, and contact areas that must not be coated
- Firmware loading requirement
- Test sequence before coating
- Inspection requirement
- UV trace requirement, if needed
- Thickness target, if specified
- Standard or customer acceptance criteria, if required
- Whether the board will be potted after coating
- Whether the order includes enclosure assembly or final product assembly
- Quantity, pilot run plan, and production run volume
If your product needs PCB assembly, testing, coating, and final assembly in one production scope, review the coating process before the quote is finalized. We can support PCB conformal coating services as part of a broader PCBA production plan when the order requires it.
Frequently Asked Questions
What is the conformal coating process?
What is the conformal coating process?
The conformal coating process is the sequence used to test, clean, mask, coat, cure, and inspect a PCB assembly. It protects the board with a thin polymer film after key electrical checks are complete.
When is conformal coating applied during PCB assembly?
When is conformal coating applied during PCB assembly?
Conformal coating is usually applied near the end of PCBA production, after assembly, inspection, firmware loading if required, and functional testing.
Should a PCBA be tested before conformal coating?
Should a PCBA be tested before conformal coating?
Yes. Testing before coating helps catch defects while the board is still easier to repair. Rework after coating takes longer and can increase the risk of board damage.
Does a PCB need cleaning before conformal coating?
Does a PCB need cleaning before conformal coating?
Many coating processes include cleaning or surface preparation. The need depends on flux type, board condition, coating material, product environment, and customer cleanliness requirements.
What areas should be masked before conformal coating?
What areas should be masked before conformal coating?
Common no-coat areas include connectors, test points, programming pads, switches, buttons, edge fingers, RF areas, sensors, LEDs, grounding pads, and mechanical mating surfaces.
What is the difference between spray, dip, brush, and selective coating?
What is the difference between spray, dip, brush, and selective coating?
Spray coating applies coating in controlled passes. Dip coating immerses the board for broad coverage. Brush coating is used for small areas or touch-up. Selective coating uses automated equipment to apply coating only to defined areas.
How long does conformal coating take to cure?
How long does conformal coating take to cure?
Cure time depends on the material and process. Some coatings air dry, some use heat, some use UV, and some need moisture or secondary cure. Cure time should be considered in the production schedule.
How is conformal coating inspected?
How is conformal coating inspected?
Inspection checks coverage, no-coat areas, visible defects, UV trace visibility if available, and thickness when specified. It helps confirm that the coating process did not create a new reliability issue.
What defects can happen during conformal coating?
What defects can happen during conformal coating?
Common defects include bubbles, pinholes, missed areas, dewetting, poor adhesion, cracking, delamination, contamination under the coating, and coating on areas that should remain exposed.
What should I send to an assembly partner before coating starts?
What should I send to an assembly partner before coating starts?
Send the product environment, coating material if known, keep-out drawing, test sequence, firmware loading needs, inspection requirements, thickness target if specified, and whether the order includes enclosure assembly or final product assembly.